Elevating Financial Branding with a Professional Credit Card Mockup
In the competitive world of financial design, first impressions are everything. Whether you are launching a new fintech startup, redesigning a corporate loyalty program, or presenting a concept for a high-end membership card, the visual presentation of your design can make or break client approval. This is where a Credit Card Mockup becomes an indispensable tool. It serves as a bridge between a flat digital design and a tangible, realistic product representation. However, simply downloading any template and dropping in a logo is often where designers go wrong. To truly leverage these assets for maximum impact, one must understand not just how to use them, but how to avoid the common pitfalls that lead to unprofessional results.
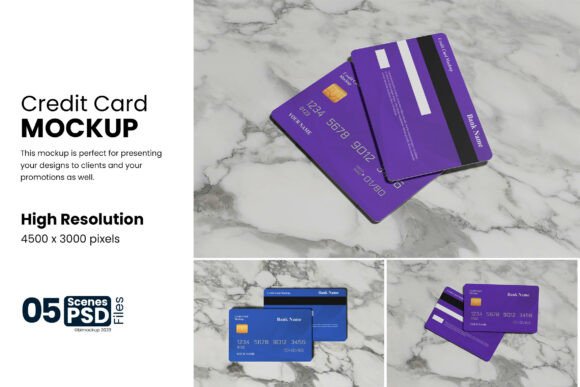
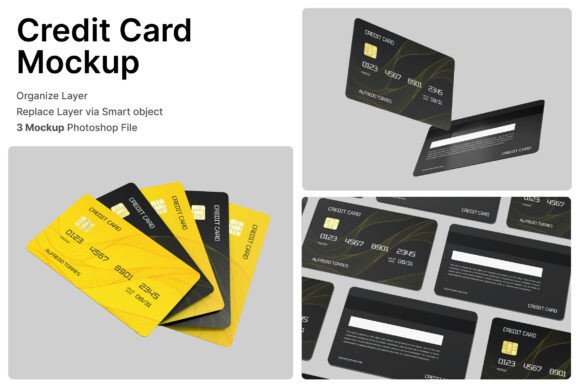
A modern credit card mockup is designed specifically for showcasing financial branding, membership cards, and corporate identity projects. At its core, it allows you to easily customize colors, logos, and card details using smart objects. The best versions, such as those including 3 PSD Files and a comprehensive Help Guide, offer flexibility that static images cannot. Yet, many users overlook the nuances of resolution and layer management, leading to outputs that look pixelated or artificial when presented to stakeholders.
The Resolution Trap and Why It Matters
One of the most frequent mistakes creators make is ignoring the technical specifications of the mockup file before beginning their work. In the rush to meet a deadline, a designer might grab a low-resolution freebie from the internet, only to find that the final image looks blurry when viewed on a large monitor or printed in a pitch deck. This directly affects the perceived quality of the brand you are representing. A fuzzy image suggests a lack of attention to detail, which is fatal in the financial sector where trust is paramount.
To avoid this, always verify the file dimensions and DPI (dots per inch) before download or purchase. A professional-grade asset should boast a High Resolution of 4000 x 3000 pixels at 300 DPI. This ensures that every texture, from the metallic sheen of a chip to the subtle grain of the card surface, remains crisp even when zoomed in. When evaluating a potential resource, check the preview images closely. If the sample looks soft or lacks definition, the source file will likely yield the same poor results. Investing time in finding a high-fidelity mockup saves you from having to redo presentations later.
Misunderstanding Smart Object Workflows
Another area where efficiency is often lost is in the handling of smart object layers. The beauty of a well-constructed PSD lies in its simplicity: you simply double-click the layer, place your design, and save. However, beginners and even some experienced freelancers often complicate this process by rasterizing layers or ignoring the guide files included in the package. This can lead to distorted logos, misaligned text, or shadows that do not match the lighting of the scene.
It is crucial to respect the structure of the file. Most premium packages include a Help File or PDF guide. Skipping this documentation is a missed opportunity to learn specific tricks, such as how to adjust the glossiness of the card or how to toggle background elements. For instance, if you are designing a dark-themed card for a luxury bank, you need to ensure your logo contrasts correctly against the mockup's lighting. By following the included instructions, you maintain the integrity of the lighting effects and reflections that make the card look real. Remember, all image stocks inside are typically not included, meaning you must supply your own artwork; ensuring your artwork is prepared correctly for the smart object window is half the battle.
Choosing the Right Angle for Your Audience
Not all credit card presentations require the same viewpoint. A common oversight is using a single angle for every scenario. While a straight-on view is excellent for showing the full layout of a rewards program, it fails to convey the premium feel of a metal card or the thickness of a corporate identity project. Relying on just one perspective limits your ability to tell a complete story about the product.
This is why having access to multiple files is advantageous. A robust package often includes 3 PSD Files, offering different angles or lighting setups. Use a dynamic angle when pitching to investors to highlight the tactile quality of the card. Conversely, use a flat, clean view when creating user interface documentation or app store screenshots. Matching the mockup angle to the context of your presentation demonstrates a higher level of strategic thinking. It shows that you understand how the physical product will be held and perceived by the end consumer.
Color Accuracy and Brand Consistency
Designers often struggle with color shifting when moving from their vector software to the mockup environment. The lighting in a 3D-rendered mockup can alter the appearance of your brand colors, making a vibrant blue look dull or a stark white appear gray. If unchecked, this can lead to brand inconsistency, where the marketed image does not match the final manufactured product.
To mitigate this, always compare your design within the mockup against your official brand style guide. Do not assume what you see on the screen is absolute. If the mockup allows for adjustment layers, use them to correct the hue or saturation slightly so it aligns with your brand standards while still looking natural in the scene. This balance between realism and brand accuracy is key. A practical approach is to create a "control" version of your design without the mockup effects and keep it side-by-side during your review process. This ensures that while the presentation looks photorealistic, the core identity remains untouched.
Making the Right Choice for Your Project
Before committing to a specific Credit Card Mockup, take a moment to evaluate your specific needs. Are you showcasing a standard plastic card, or do you need to represent a specialized material like brushed metal or wood? Does the project require a focus on the chip and pin area, or is the back signature strip more important? Asking these questions helps narrow down the search and prevents the frustration of buying a generic template that doesn't fit the unique requirements of your project.
Furthermore, consider the long-term utility of the asset. A versatile mockup that supports various customization options will serve you well across multiple projects, from employee ID badges to limited-edition loyalty cards. Look for features like organized layer groups and clear naming conventions. These small details significantly speed up the workflow, allowing you to iterate designs rapidly without getting bogged down in technical confusion.
Ultimately, the goal is to present a vision that feels attainable and high-quality. By avoiding low-resolution traps, respecting smart object workflows, choosing appropriate angles, and maintaining color fidelity, you transform a simple image file into a powerful communication tool. Whether you are a marketer launching a new campaign or a freelancer delivering a final proof, the right mockup elevates your work from a concept to a compelling reality. Take the time to select and use these tools wisely, and your financial branding projects will reflect the professionalism and care they deserve.